
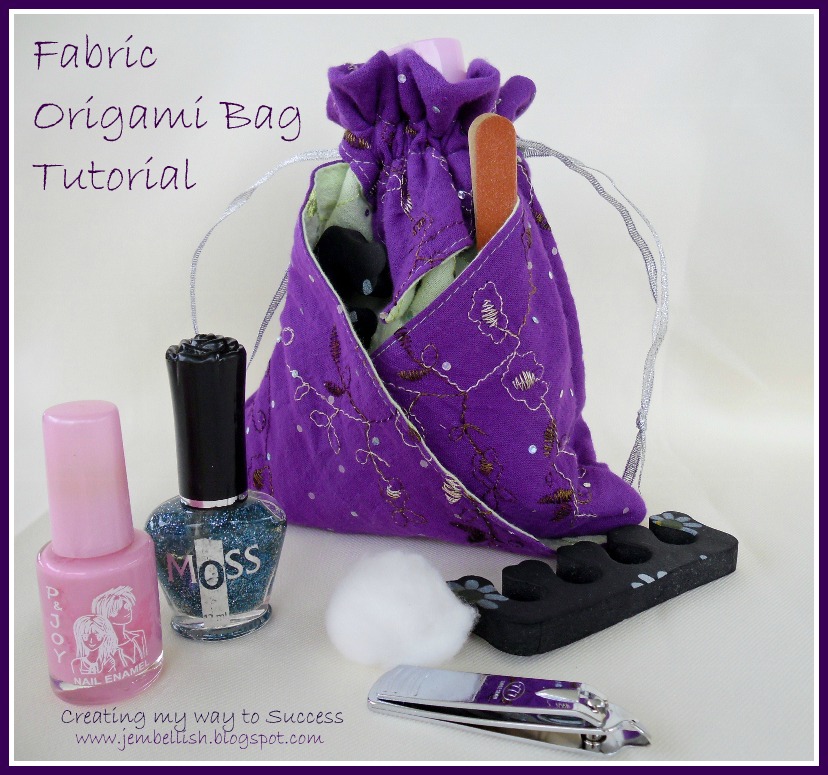
I've had a lot of requests to show how I made this bag - so here's a simple photo tutorial to show you:
You can make this bag whatever size you want - the bigger the fabric square you start with, the bigger the bag will be.
I used 2 fabric squares 41cm (16") for this bag.
I used fabric from 2 old dresses (because I love a good upcycle!!)

Stitch the 2 squares right sides together (remembering to leave a small gap to turn out through), clip the corners and turn out; then top stitch around all 4 edges.
Now you have a nice double sided fabric square to make your bag with.
.jpg)
First lay this square flat with what you want to be the OUTSIDE of the bag face down. (I wanted the purple to be the outside here).
Now you need to fold the bottom corner up, then the top corner down. Play around with this until it looks nice and even!
If you like you can measure to check the sides are even.
.jpg)
.jpg)
Now take a ruler and either draw a line or mark with pins down through the centre from point to point:
.jpg)
Then stitch along this line.
.jpg)
Next fold in both side corners:
.jpg)
.jpg)
.jpg)
Now run 2 rows of stitching on both sides where you just folded. This will form the casing for the drawstring or ribbon. It doesn't matter exactly where you stitch these rows. Just make sure the gap between them is wide enough to thread your ribbon through.
.jpg)
.jpg)
Now fold the bag in half - so all the folds are on the inside of the bag:
.jpg)
.jpg)
And stitch down both sides close to the edge - you are stitching the sides of the bag here!
.jpg)
Now turn the bag out so the folds are on the outside!
.jpg)
Now all that remains to do is thread the ribbon or cord through.
I used lengths, 45 cm (18") each. Use a large safety pin to push each piece through the casing you created with your stitching. Thread one piece through both sides from the left, and then the other piece through both sides from the right.
.jpg)
.jpg)
Tie the ends of each piece of ribbon together at the sides:
.jpg)
And now you're finished!
.jpg)
Fill it up and use your new pretty bag!
.jpg)
.jpg)
For the downloadable PDF version of this tutorial, click here.

And please do take a look through my other free sewing tutorials.
There are over 100 available for all levels of sewing ability.


Wonderful tutorial Jill....thanks so much. I will get to and link this on my blog as I know that there are so many people in search of a tutorial like this. :-)
ReplyDeleteVery smart Jill, I love this.
ReplyDeleteSo nice, J! Looks simple enough for a semi-beginner.
ReplyDeleteJeepers that is clever! Way to go Jill!
ReplyDeleteGreat tutorial!! I pinned it here: http://pinterest.com/pin/173529391862462347/
ReplyDeleteThis is so cool! Cannot wait to give it a try! Great upcycle idea as well!
ReplyDeleteRebecca @ heroncrafts.blogspot.com
This is very sweet - thanks for the tutorial.
ReplyDeleteJill, this is fantastic. Your tutorial is clear. This bag is functional with "isolation". Love it love it. I must follow to make one.
ReplyDeleteGreat tutorial, Jill! Easy to follow and cute bag.
ReplyDeletevery nice tutorial! Found you through Fireflies and jellybeans linky party!
ReplyDeleteThis is so much fun, my daughter and I both love it! I showed you off tonight at the weekend show off party!
ReplyDeleteCarlee
www.ladybirdln.com
great tutorial, i find it a beautful idea.
ReplyDeletethank you
love this, and simple tute too, thanks so much for sharing this. Have to make one.
ReplyDeletewonderful tutorial.... love this bag... i thing i'll sew this one for sure
ReplyDeleteI think I will try to add a strap make it bigger for a purse
ReplyDeleteVery cute! I'm thinking I may try this with handkerchiefs!
ReplyDeleteHow did it turn out with the handkerchiefs? Would love to see a photo.
DeleteEmail sueo_@hotmail.com Thanks.
I love it! Thanks for sharing.
ReplyDeletemade one last night for a friend. Really simple but so effective. Thanks
ReplyDeleteThis comment has been removed by the author.
ReplyDeleteThis comment has been removed by the author.
ReplyDeleteDo I need to purchase license to sell these. I plan to put items in and sell as gift bags, you know instead of gift basket. These would be for a fundraiser for our vets
ReplyDeleteThis comment has been removed by the author.
ReplyDeleteThanks for this great tutorial. I am making these for some of my female gift recipients for christmas. The first one is on my blog:
ReplyDeletehtto://iheartzürich.blogspot.com
Hello, I check your blog regularly. Your humoristic style is witty, keep it up!
ReplyDeleteLook into my blog post : earn cash make money online
wonderful...
ReplyDeletethat is so cool an looks pretty easy to make, great tutorial
ReplyDeleteVery very cool! Did you use any interfacing? Would you recommend it? I think I'm going to try making this with some medium-weight interfacing this morning and will report back on how mine turned out. Love that you used those gorgeous dresses.
ReplyDeleteUsed the interfacing on the outside of the bag (it was quilter's cotton) and a heavy satin for the inside and it turned out great. The interfacing was probably not necessary in retrospect, so the next one I make (this time as a gift for a friend I'm having dinner with tonight) I will skip the interfacing. Loved making the project though, and absolutely adored the tutorial!
ReplyDeleteThanks for letting us know how it went with the interfacing Niki - glad you enjoyed the tutorial!
DeleteI found that one of the steps is misleading for new sewers. When you have the two square and put them right sides together and sew around them. You need to leave an opening so you can turn it out. I knew this and loved the pattern but new sewers might not. Without an opening you can not turn it out. You close that hole up when you sew all around the edge. Does this make sense? Loved the project and plan to make some larger ones next.
DeleteThanks for letting me know about the omission in the first step instructions - I have added the note to leave an opening so you can turn the fabric right sides out!! :)
DeleteHave just made one of these (so easy with the picture tutorial) My granddaughter has claimed it, looks as though I'll have to make another or more!!
ReplyDeleteExtra idea.
ReplyDeleteThis is a fabulous tutorial and a fabulous design. I have made 2 bags - one small as shown and I made a large one as a purse and they are so cute! Thanks so much for the tute!
ReplyDeleteSo glad you liked the tute!
DeleteI tried this tutorial on a smaller square of fabric to house a "Cross Stitch Starter Kit" for a friend. I found your instructions to be so easy to follow, made fiddly only by my own misjudgement. I will absolutely be trying to make a larger bag for my art supplies. Thank you so much for sharing!
ReplyDeletehttp://stitchwithtea.blogspot.co.uk/2013/08/fabric-origami-bag.html
Thanks for the link - what a cute little bag! So glad you could follow the tutorial ok!!
DeleteI love this bag! Thank you for the pictured tutorial! Will be making a few of these very soon!
ReplyDeleteI included a link to your instructions in today's round up ... http://lanettascreations.blogspot.com/2013/09/fabric-origami.html#.UkFeC4asiSo
Thanks Lanetta!
Deletesuper bravo biz
ReplyDeleteThanks Josette!
DeleteI needed a quick bag with little mug bag. This was perfect with great instructions.
ReplyDeleteWith gratitude.
You're so welcome Shannon, glad my tutorial helped!
DeleteThank you so much for this tutorial. Our church observes Good Friday as a day of service, and I'm part of the charity sewing team. We made these today, and will fill them with toiletries. They will be given to a local women's shelter. Wonderful pattern! Again - thank you!
ReplyDeleteYou're very welcome. So happy to know my tutorial has helped in a great cause!
DeleteWhat size square did you start with and what was the finished size?
ReplyDeleteHi Gabrielle,
DeleteI used 2 fabric squares 41cm (16") for this bag.
The finished size is just under 20cm (8") tall and slightly narrower than that.
Thank you sooooo much. I purchased a small shop made kit for this bag. It came with terrible instructions....your instructions with photos were just what I needed! Thank you for sharing.
ReplyDeleteSo glad my tutorial could help you Marie!
DeleteYou are BRILLIANT!!! I love this! And, I have to tell you, I have read countless ways on how to do a drawstring, but your instructions actually made sense. (new sewist). Love Origami AND sewing, so this is a wonderful mix! Thanks again. -Amy
ReplyDeleteAw thanks Amy - glad the tutorial is nice and clear for you! Have fun sewing up some cute origami bags!
DeleteJill you are so clever! A great upcycle and i love all the little pockets it creates.
ReplyDeleteThanks so much Fiona. It's one of my favourite bags - and so simple to make too!
DeleteJust printed out the PDF.....I love using old fabric scraps. Especially velvet.....thank you for this great pattern.
ReplyDeleteHappy Sewing!
DeleteHi Jill. Thank you so much for the tutorial. Made one of these today as a gift for a young lady. Your tutorial is great and the bag very easy to make. The only question I would have is what size seam did you sew? I used a 3/8" seam so I could top sew at a 1/4". Also for other sewists I used two layers of quilters cotton and found the drawstring didn't gather as nicely as perhaps thinner, softer fabrics will. Will definitely be making this bag again in a larger size maybe in lawn or poplin. Maybe even in some silk I have been hoarding for a few years;).
ReplyDeleteHi Deb. I too use a 3/8" seam, and yes, lighter fabrics do work much better with this bag!
ReplyDeleteTook me a few years to find this but it's so perfect for what I wanted to do! I really appreciated teh .pdf with the photos! THank you!
ReplyDelete